Download this zip file before starting this section. Lesson_2.zip
Previously: SpriteKit and Swift Part 1: Creating the Game Scene

In this tutorial we are going to look at adding the player ship to the screen as shown in the image above. This tutorial is more the "bite size” that I planned before and should only take a few minutes. Lets start by creating a new class file for our ship. If you are unsure how to create a new class file refer back to the previous tutorial for the instructions on how to do that. Name this new class something like KGPlayerShipNode.swift which is a subclass of SKSpriteNode. You can call this class whatever you like, just remember that the remainder of the tutorial will use the classnames I show here.
Look through the contents of the zip file and add the image of the the space ship, Assets/SpaceFighter.png to the images.xcassets folder. If you are unsure how to do this, review the previous tutorial which goes through this process in detail.
Update the new class file to look like the following by removing the line referring to UIKit and replacing it with SpriteKit as in the previous tutorial.
1 import SpriteKit
2
3 class KGPlayerShipNode: SKSpriteNode {
4
5 }
Sprites are essentially just images added to the game scene. Often sprites have some other behaviour that makes up the mechanics of the game play, movement, attacking, and countless other actions. Right now our sprite really doesn’t do anything. We can now update our player ship class so that when we create a new instance of the player ship it looks like our space fighter. Update your code to look like the following.
 1 import SpriteKit
 2
 3 class KGPlayerShipNode: SKSpriteNode {
 4
 5     let defaultTextureName = "SpaceFighter"
 6     let defaultSize:CGSize = CGSize(width: 200.0, height: 53.0)
 7
 8     override init() {
 9
10         let texture = SKTexture(imageNamed: defaultTextureName)
11         let color = UIColor.redColor()
12         let size = defaultSize
13     }
14 }
Firstly we create a string constant defaultTextureName for the texture file we will use by default and assign the string SpaceFighter as it’s value.
Then we create a new constant called defaultSize, this lets us avoid having a magic value in our initializer.
We could have just created a new size directly inline and the compiler would have been happy to continue along and the program would work normally, however if that value changed at some point in the future it may be difficult to return it to the default if we don’t store it somewhere. Generally avoiding magic values will save headaches later on.
So, why not for the other values assigned in the initializer?! Well the color that is assigned is more of a debugging tool, if you failed to assign a texture you should see a red rectangle at the default size, but it really isn’t necessary and if it changes to another value at some point while our program is running, it won’t really matter.
Lets move on to the next bit.
You should see now that the live compiler has found an error, required' initializer 'init(coder:)' must be provided by subclass of ‘SKSpriteNode’. What this tells us is that since we are overriding init() we must also include init?(coder:). This is pretty easy to fix. We could write the code to use the init?(coder:) but Xcode can provide some help here. Click on the red circle in the gutter and a dialog will pop-out from where you clicked presenting options, choose Fix-It. This will insert some code into the class that will silence the error. Your class should now look like the following.
 1 import SpriteKit
 2
 3 class KGPlayerShipNode: SKSpriteNode {
 4
 5     let defaultTextureName = "SpaceFighter"
 6     let defaultSize:CGSize = CGSize(width: 200.0, height: 53.0)
 7
 8     override init() {
 9
10         let texture = SKTexture(imageNamed: defaultTextureName)
11         let color = UIColor.redColor()
12         let size = defaultSize
13     }
14
15     required init?(coder aDecoder: NSCoder) {
16         fatalError("init(coder:) has not been implemented")
17     }
18 }
Now we have a new error! Super.init isn’t called before returning from initializer. What this tells us is that our init() function never calls the super class designated initializer before the function is finished. We can fix this by calling the designated initializer for SKSpriteNode. Update the init() function to look like the following.
1 override init() {
2
3         let texture = SKTexture(imageNamed: defaultTextureName)
4         let color = UIColor.redColor()
5         let size = defaultSize
6
7         super.init(texture: texture, color: color, size: size)
8     }
Now lets open the game scene class file GameScene.swift. Lets begin by deleting some lines which are not going to be needed in the game. Refactor GameScene.swift so that it looks like the following example.
1 import SpriteKit
2
3 class GameScene: SKScene {
4
5 override func didMoveToView(view: SKView) {
6 /* Setup your scene here */
7
8 self.backgroundColor = SKColor.blackColor()
9
10 self.loadStarField()
11 }
12
13 override func touchesBegan(touches: NSSet, withEvent event: UIEvent) {
14 /* Called when a touch begins */
15 }
16
17 override func update(currentTime: CFTimeInterval) {
18 /* Called before each frame is rendered */
19 }
20
21 func loadStarField() {
22 let starField = KGStarFieldNode()
23 self.addChild(starField)
24 starField.beginSpawningStars()
25 }
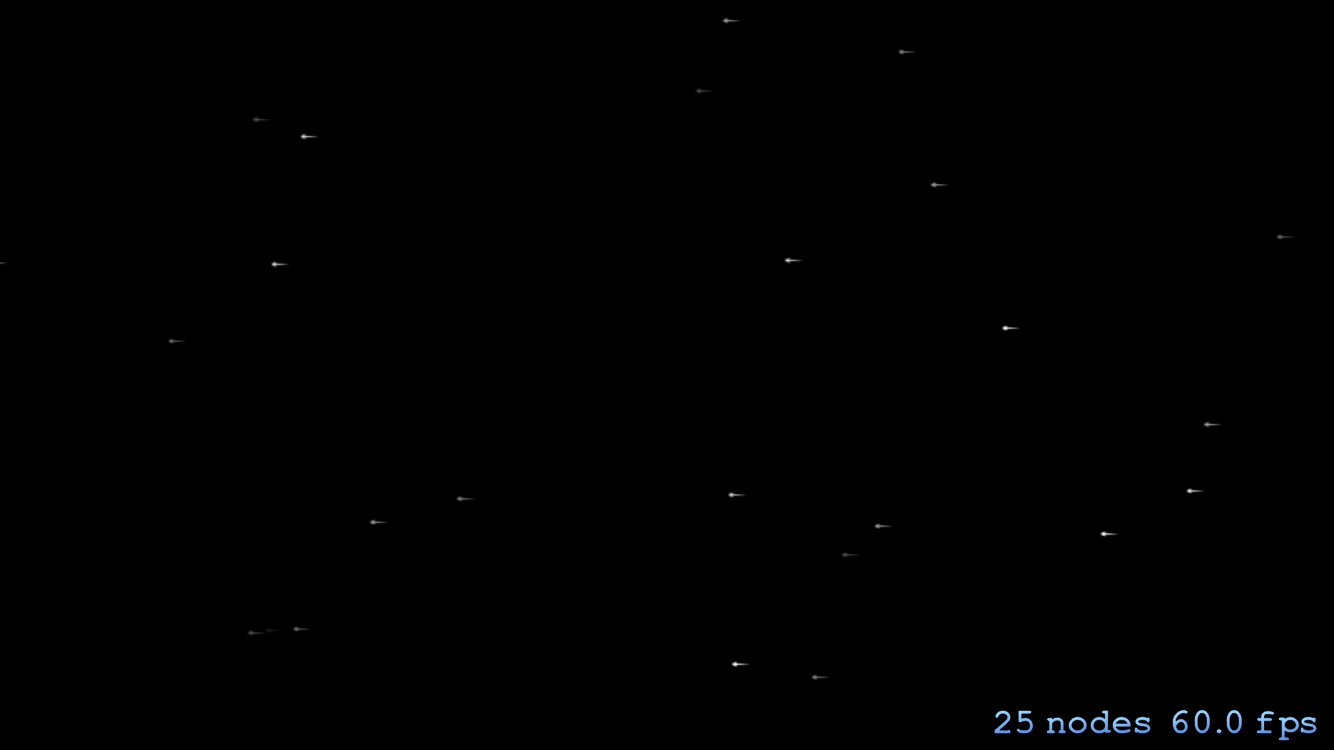
26 }Build and run the game at this point and all you should see is the vast emptiness of space scrolling by,…and the frame counter in the bottom right.
f you have any errors at this point, it’s a good idea to go back to the top of this tutorial and work through it again to make sure you haven’t overlooked something.
After the loadStarField() function roughly line 34, skip a line and add the following function.
1 func loadPlayerShip() {
2         let playerShip = KGPlayerShipNode()
3         playerShip.position = CGPointMake(CGRectGetMidX(self.frame), CGRectGetMidY(self.frame))
4         self.addChild(playerShip)
5     }
This is the function that will add our players ship to the game area. Now update the didMoveToView() function to call the loadPlayerShip(). Loading the player ship should be done after our star field is added.
1 override func didMoveToView(view: SKView) {
2         /* Setup your scene here */
3
4         self.backgroundColor = SKColor.blackColor()
5
6         loadStarField()
7         loadPlayerShip()
8    }
Alright lets build and run and see our ship hurtling through the stars!
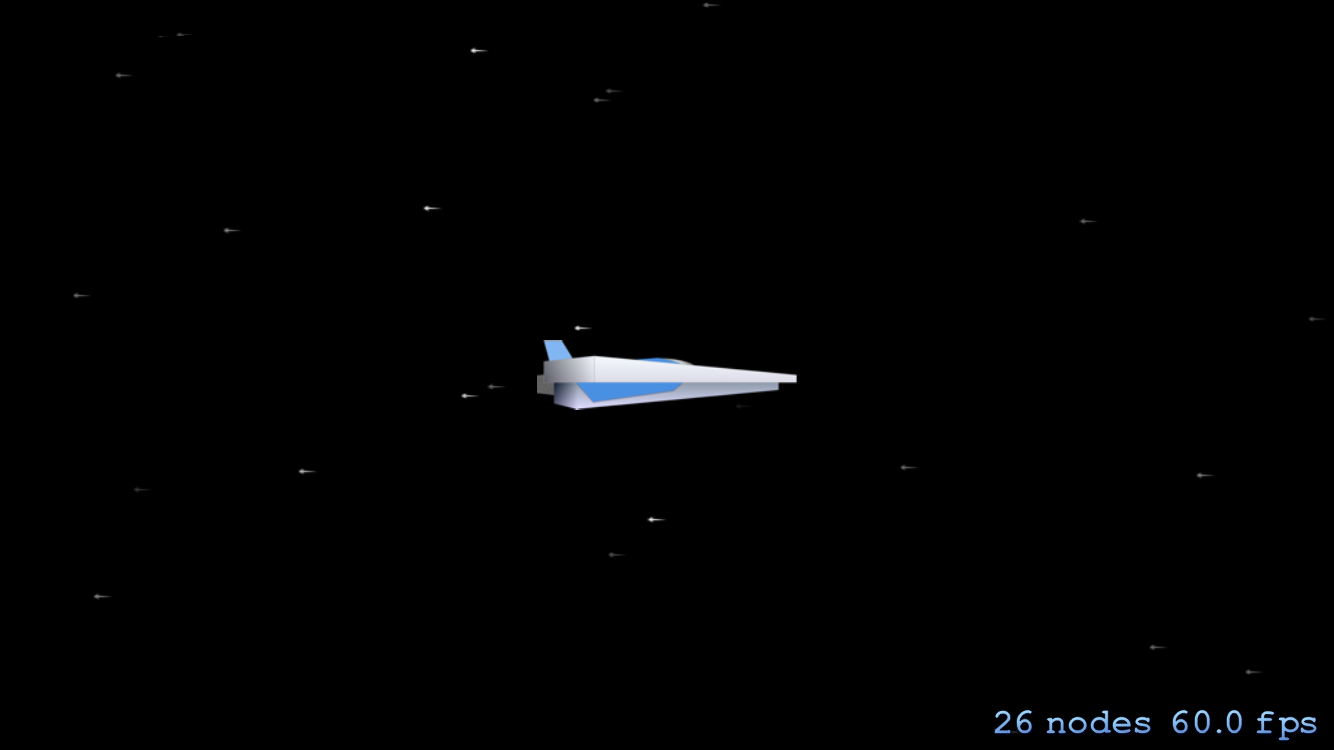
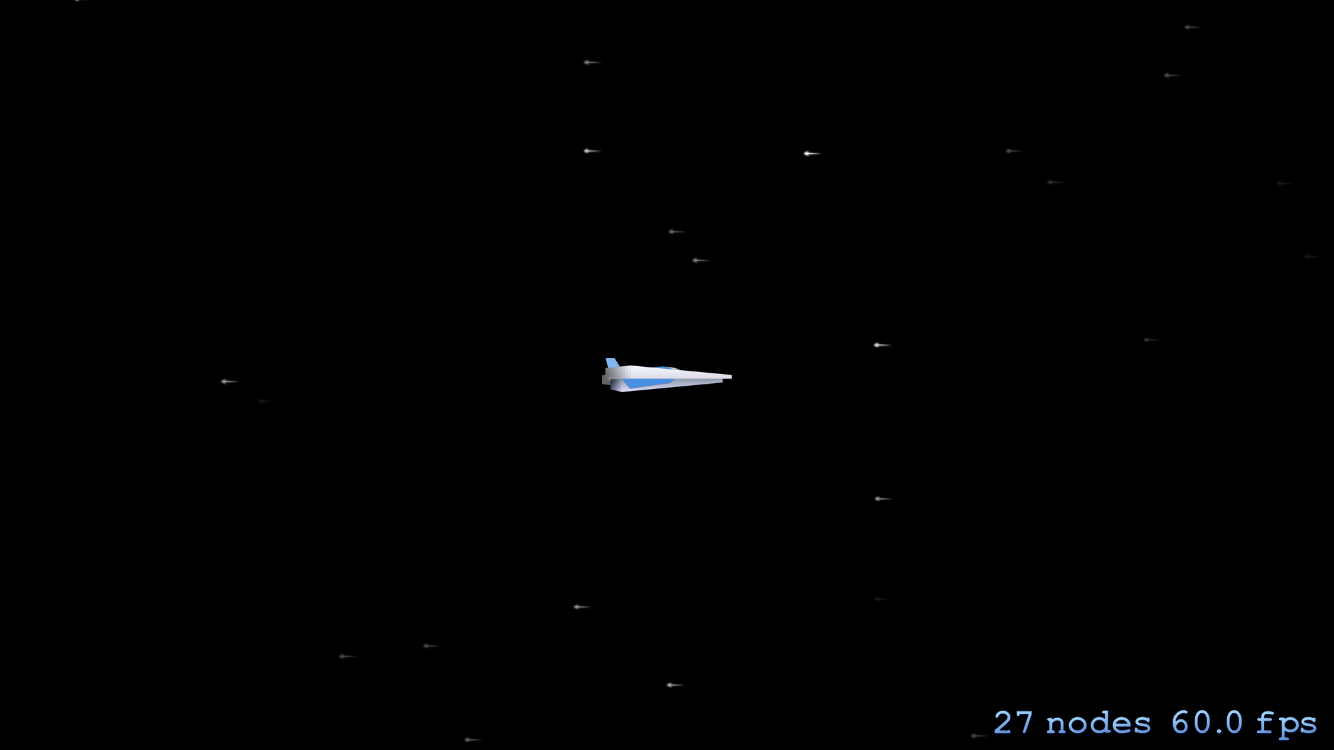
Hmm a ship this size might be very intimidating to the enemy, but it doesn’t give us much room to move around. Right now our ship isn’t scaled in the way we might like. We’re going to fix that by going back to the KGPlayerShipNode.swift file and adding some code to fix it.
Update the KGPlayerShipNode class to look like the following example and then build and run again.
 1 //
 2 //  KGPlayerShipNode.swift
 3 //  KType
 4 //
 5 //  Created by Kyle Goddard on 2015-03-26.
 6 //  Copyright (c) 2015 Kyle Goddard. All rights reserved.
 7 //
 8
 9 import SpriteKit
10
11 class KGPlayerShipNode: SKSpriteNode {
12
13     let defaultScale:CGFloat = 0.5
14     let defaultTextureName = "SpaceFighter"
15     let defaultSize:CGSize = CGSize(width: 200.0, height: 53.0)
16
17     override init() {
18
19         let texture = SKTexture(imageNamed: defaultTextureName)
20         let color = UIColor.redColor()
21         let size = defaultSize
22
23         super.init(texture: texture, color: color, size: size)
24
25         loadDefaultParams()
26     }
27
28     required init?(coder aDecoder: NSCoder) {
29         fatalError("init(coder:) has not been implemented")
30     }
31
32     func loadDefaultParams() {
33         self.xScale = defaultScale
34         self.yScale = defaultScale
35     }
36
37 }
Space sure feels roomier now!
So that’s it for this tutorial, hopefully it was a little more easily digested than last time. This is about the length I’d like to keep them, if anyone feels any differently please let me know or add it to the discussion below. Next time we will see about getting the ship to move around the screen.
I’ve also been asked how often these tutorials will be published. I’ll aim to have 1 or 2 tutorials published per month. This should let me release them often enough and still have time for work, family and other projects that are on the go.
Thanks for reading!
Previously: SpriteKit and Swift Part 1: Creating the Game Scene