I was starting to think I should have called this "Part 4: The Cursed Update". It's finally here! Part 4 of this series of tutorials covering SpriteKit and Swift. Sorry to those who have been waiting.
Download this zip file before starting this section, which is the code for the finished project at the end of this tutorial. Lesson_4.zip
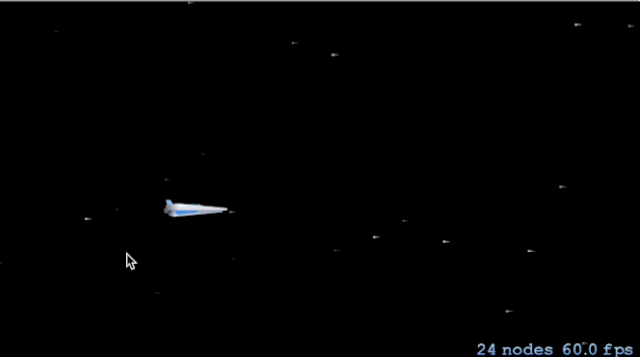
At the end of the tutorial you should have something similar to the following example below.
It should be noted that I used Build iOS Games with Sprite Kit: Unleash Your Imagination in Two Dimensions as a reference when researching how to add ship movement. This is a great book for beginners, especially beginners to programming in general. The tutorials are in Objective-C however and for the sake of teaching novice programmers, there is a tendency to limit OOP practices.
Let's get moving! ;)
Open the your finished project from the previous tutorial, and open the file GameScene.swift. We're going to start by updating how the player ship is loaded into the scene. Previously we simply plunked an instance KGPlayerShipNode into the game scene. This approach could be made to work, but the only way to then get a handle on the ship would be to enumerate all the nodes in the scene and see if the name matches. Instead what we're going to do is add variable to our game scene to store the player ship in. Find the function that looks like the following:
1 func loadPlayerShip() {
2     let playerShip = KGPlayerShipNode()
3     playerShip.position = CGPointMake(CGRectGetMidX(self.frame), CGRectGetMidY(self.frame))
4     self.addChild(playerShip)
5 }
Delete and replace that function with this new code:
 1 func loadPlayerShip() {
 2     self.addChild(playerShip)
 3 }
 4
 5 lazy var playerShip: KGPlayerShipNode = {
 6     let shipNode = KGPlayerShipNode()
 7     shipNode.position = CGPointMake(CGRectGetMidX(self.frame), CGRectGetMidY(self.frame))
 8     shipNode.name = "PlayerShip"
 9     return shipNode
10 }()
What we've done here is moved the code responsible for creating the playerShip into a lazy instantiated variable in the GameScene object. What this means is that our application will not actually create a player ship object until the first time we as for it. Once we ask for it you might notice that the code is pretty similar to our old loadPlayerShip function with a few exceptions. For instance we still create a new instance of KGPlayerShipNode and then we still position it relative to our game scene. The differences are that we now set a name property of the player ship to the value "PlayerShip" and the player ship object is stored in a property playerShip on the GameScene class. This will prove useful if we need to frequently ask the game scene for the ship later on.
Open up the KGPlayerShipNode.swift file next and add the following to the top of the class:
1 import SpriteKit
2
3 class KGPlayerShipNode: SKSpriteNode {
4
5     var touchPoint: UITouch?
6     var lastInterval: CFTimeInterval?
7     var travelling: Bool
8     let brakeDistance:CGFloat = 4.0
9     let defaultShipSpeed = 250;
Let's quickly run down what has been added here. The optional variable touchPoint is used to store the UITouch object that will eventually describe the destination of the player ship. The optional variable lastInterval is used to describe the last time that the update loop updated the ship object. The boolean travelling informs the ship if it is moving or not. The constant brakeDistance is used as a fudge factor in the math that calculates if the ship has reached the point the user wants as the destination for the ship. The constant defaultShipSpeed is the speed in which the player ship will move in space, by default.
Next we need to update the initializer for the KGPlayerShipNode class to set a value for the variable travelling.
 1 init() {
 2
 3     let texture = SKTexture(imageNamed: defaultTextureName)
 4     let color = UIColor.redColor()
 5     let size = defaultSize
 6
 7     travelling = false
 8
 9     super.init(texture: texture, color: color, size: size)
10
11     loadDefaultParams()
12 }
Hold on a moment?! We didn't add self infront of travelling?
Swift doesn't care, and just assumes you mean self in situations where a local variable name doesn't shadow a property name on the class. Since the init function doesn't take any arguements named travelling and there are no local variables (variables created inside the function) called travelling, Swift just assumes you mean the property travelling on the KGPlayerShipNode class. This can make the code look a little cleaner and save some characters, however if you prefer you can still use self.travelling if you would rather be explicit.
Next we're going to add a function that calulates the movement of the ship and uses some trigonometry to smooth the movement and make it seem more natural. Rather than get into a trig lesson (a topic which my grasp is weak in anycase), this snippit is going to be a bit of a black box. Simply add the following function to the bottom of the KGPlayerShipNode class.
 1 func travelTowardsPoint(point: CGPoint, byTimeDelta timeDelta: NSTimeInterval) {
 2     var shipSpeed = defaultShipSpeed
 3
 4     var distanceLeft = sqrt(pow(position.x - point.x, 2) + pow(position.y - point.y, 2))
 5
 6     if (distanceLeft > brakeDistance) {
 7         var distanceToTravel = CGFloat(timeDelta) * CGFloat(shipSpeed)
 8         var angle = atan2(point.y - position.y, point.x - position.x)
 9         var yOffset = distanceToTravel * sin(angle)
10         var xOffset = distanceToTravel * cos(angle)
11
12         position = CGPointMake(position.x + xOffset, position.y + yOffset)
13     }
14 }
Next we are going to add an update method to the KGPlayerShipNode class that we will call on every update loop. Using the interval of time between updates indicates (based on our ship speed) how much the ship should move towards the destination point for each update.
 1 func update(interval: CFTimeInterval) {
 2
 3     if lastInterval == nil {
 4         lastInterval = interval
 5     }
 6
 7     var delta: CFTimeInterval = interval - lastInterval!
 8
 9     if (travelling) {
10         if let destination = touchPoint?.locationInNode(scene as? GameScene) {
11             travelTowardsPoint(destination, byTimeDelta: delta)
12         }
13     }
14     lastInterval = interval
15 }
The update() function takes a single argument interval: CFInterval. The interval is handed into the ship object from the game scene. This ensures that the interval for our update loop in the game scene matches the interval for our ship. The variable delta indicates the amount of time that has passed between the previous interval and the current interval. This delta time is multiplied by the ship speed in the travelTowardsPoint() function to move our ship the required amount on each update. This calculation is only made if the travelling property is true. Finally the current interval becomes the lastInterval.
That's pretty complicated. The update function is run once for every frame of the game. This gives us a baseline on which to calculate the things that are going on in our game. While a game running at 60 frames per second will animate more smoothly than one running at 24 frames per second, since our calculations are based on the time between frames (the delta time) and not on the number of frames that are passing, a ship moving from one point to another will take the same time, regardless of frame rate. This means that our game will play the same way on an older device as it does on a newer more capable device, and not give the player with a newer device any unfair advantages.
We're almost done lets go back to GameScene.swift and find the update() function.
1 override func update(currentTime: CFTimeInterval) {
2     // Called before each frame is rendered
3     playerShip.update(currentTime)
4 }
As mentioned earlier, call the update method of the playerShip object and pass in the same interval argument.
Lastly we need to indicate where the touch event occured. Find the touchesBegan() function and add the following lines.
1 override func touchesBegan(touches: Set<NSObject>, withEvent event: UIEvent) {
2     // Called when a touch begins
3
4     if let destintation = touches.first as? UITouch {
5         playerShip.touchPoint = destintation
6         playerShip.travelling = true
7     }
8 }
This code gets the first UITouch object from the set of touches and sets that touch object as the touchPoint property on the playerShip. This code also sets the travelling boolean to true, since pressing on the screen is the indicator to the game that you wish the ship to travel.
Okay build and run!
If you are unable to build and go back and make sure there are no typos in any of the newly added code, and try again.
So our ship moves, but there is a problem. If we lift our finger off the screen, the ship continues to move towards the point where we lifted off. This isn't ideal, so lets fix it.
1 override func touchesEnded(touches: Set<NSObject>, withEvent event: UIEvent) {
2     playerShip.travelling = false
3 }
There, now the ship stops on a dime when we lift our finger, giving us the ability to easily dodge whatever may come our way in the future.
That's all for now folks. Assuming there are no updates to Swift between now and the next tutorial; the next tutorial will deal with adding the exhaust from our ship using particles.